Showing posts with label tutorial. Show all posts

Thursday, 9 August 2012

DIY Leather Clutch Bag


Hello! Today I am going to show you how I made this leather clutch bag, above. It is so unbelievably easy to make - anyone can do it! It literally look me about 30mins, if that! So anyway, here is how I made it:

You will need:
Material  //  2 templates  //  Pins  //  Paper Scissors  //  Fabric Scissors  //  Sewing Machine

Step 1: Measure and cut out two templates in paper/card - one which measures 37cm by 21cm and the other which measures 37cm along the bottom and then a 45° angle from each corner of the bottom line until the two lines meet.


Step 2. Fold the fabric just enough so that the rectangular template can sit on top with the edge against the fold and pin to fabric. ONLY cut up the sides of the fabric DO NOT cut across the top or along the fold.


Step 3. Then you want to place the second template above the first, pin to fabric and cut up the sides to the point. DO NOT cut along the bottom inbetween the two templates.

Once you have unfolded your fabric your material should look like this (above).

Step 4. Now what you want to do is fold the material up to the cornera of the triangle - right sides together - and sew along both sides.


Step 5. Fold your bag in on itself so that the right side of the material is now on the outside. Next is the fastening and you can use anything you wish - buttons, poppers, velcro, or you can even just leave it without a fastening. I have gone for these little silver screw things (not sure what they are called).

Step 6. If you are using these silver things like me, you basically have to fold down the triangle part of the bag and line up where you want the fastening to be on the rectangular part of the bag. Then make a hole through both pieces of material.

Step 7. The silver screw goes through the hole on the rectangle part from the inside out and the second part to the screw just screws on top. Then the hole on the triangluar part just slips over the silver notch to stay in place.

And that's it! Your clutch bag is complete :)


I hope you all understood my instructions, I do appologise for my terrible way of explaining things today! Please let me know if you try this, I would love to know how you all get on :)


Thursday, 2 August 2012

DIY TUTORIAL: How to cut big arm holes

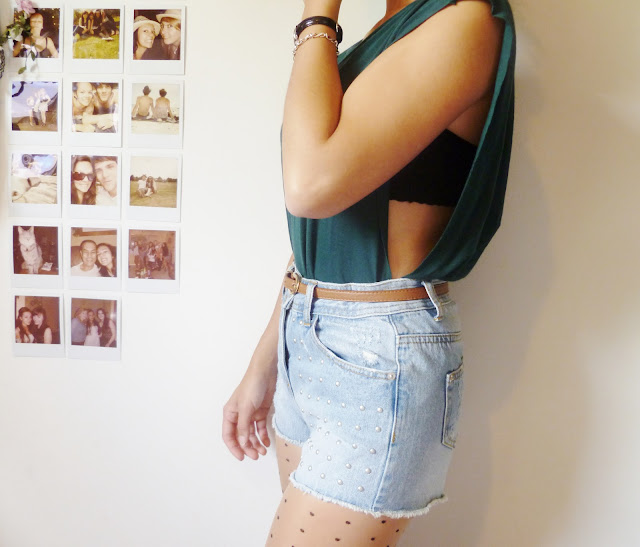
Hello, hello! Today I am doing a tutorial on how to cut your t-shirts to make bigger arm holes. Having wide arm holes to show off the side of your body is big in fashion at the moment, and they have some great tops in Urban Outfitters (seen below), but rather than buying one why not buy a cheap shirt and do it yourself?

I found a really lovely deep green basic t-shirt in New Look at the weekend and fell in love with the colour, however I wasn't keen on the sleeves as I don't often where t-shirts, so I decided to cut them off making the arm holes bigger. Here's how I did it:

You will need:
T-shirt  //  Fabric Scissors  //  Pins  //  Tape Measure


Step 1. Measure how far down the top, from underneath the arm, you would like your arm hole to finish. Mine measure's 7.5"


Step 2. Measure along the shoulder line, from the neck, and mark with a pin where you want your shoulder to end. Mine measure's 4.5"


Step 3. Pin a line from one measurement to the other and cut alongside the row of pins.


Step 4. Fold the top in half, making sure that it all lines up properly, then cut alongside the pinned line on the other half of the t-shirt.
And that's it, it is that simple! Your t-shirt should now look a little something like this!


Monday, 20 February 2012

DIY Inspiration - Topshop

Hello lovelies! I was looking through all of your lovely blogs the other day and came across an outfit post on Dozen Dresses which really inspired me. The top that Sonia, from Dozen Dresses, is wearing in the images below is from Topshop and I just love the slits in the arms because it just makes an outfit a bit more interesting, plus it adds interest to an average, boring top!


After seeing this I thought I would just cut some slits in the sleeves of an old top I had and hope that it turned out just as good as this one!

You will need:
  • Top
  • Scissors
  • Measuring Tape
  • Pins


 Step 1: Measure 1.5 inches in from the edge of the arm and mark with pins.


Step 2. Measure 0.5 inches in between each cut that you will make and mark with a pin. You can cut free hand, I'm just picky! Then just cut every 0.5 inches up to your line of pins, simple!


And there you have it! Excuse the terrible photo's, I had to take them quickly before popping out. An outfit post including this top will be up tomorrow so you can see the top properly within an outfit. I think it's a great, simple way to add detail to a plain top.


P.S - Don't forget, you can now catch the latest posts on my Facebook page and just a glimps of the sorts of clothes I will be selling in the summer! And you can follow me on bloglovin' by clicking the link below!

Follow Silent Sweetheart.

Tuesday, 7 February 2012

DIY Tutorial: Fur Headband

So as you may have seen in my outfit post below I made a fur headband today. Fur headband's are becoming very popular lately and I had loads of faux fur fabric lying around so I thought I would just make myself one, and also show you lot how I did so that you can do the same!

You will need:
  • Material
  • Scissors
  • Pins
  • Sewing Machine
  • Thread
  • Needle

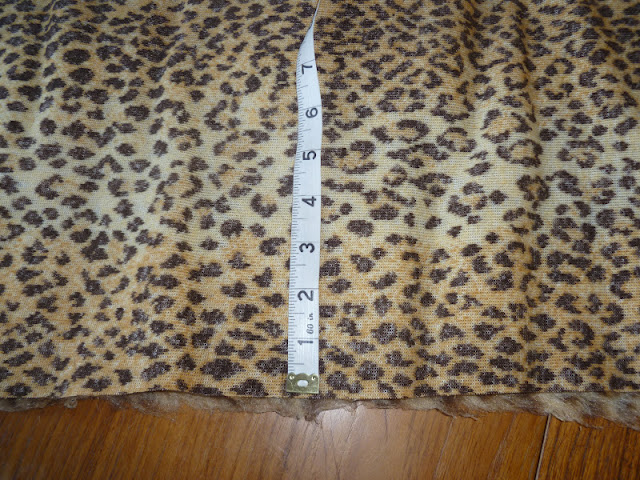
So you will need material and for this I have chosen leopard print faux fur, but you can use any material you like, it will still work just the same :)


1. You will need to measure around your head to decide how long your headband will be. Remember to add about 5 or 6 inches to your head measurement to leave plenty of room to sew the headband together. I am making my headband 30 inches long just to be on the safe side as I made my first headband too small!!


2. You then need to decide how tall you want your headband to stand. I am going to make my headband 4 inches wide.


3. You will need to cut two of these strips, or one in your material and one in a linning fabric, it's up to you. I have gone for using the same fabric.


4. You then need to lay one on top of the other, right sides facing each other (the fabric you want to be showing face down on top of another piece facing up). You only need to sew down the length of the fabric on both sides, do not sew the width of the fabric as you will need to turn your fabric in the right way.


5. And sew!


6. So this is what you should end up with after sewing. You will then need to turn your headband inside itself so that the right side is then showing.


7. And it should look like this.


8. Now you need to attach both ends to finish off your headband, so take one end and fold the rough edges into the tube.


9. And then put the other end into the end you are already holding so that it makes a full circle. Once you have done that you can sew it to close the circle. You can either use the sewing machine or hand stitch depending on how thick your material is.


And that's it! I hope I explained everything ok, if you do have any questions then don't hesitate to ask. And if you do give this a go then let me know how it goes, I may even start to sell some in a few weeks if anyone would be interested?

One more thing before I go, please take the time to check out my facebook page (link at top of page) for Silent Sweetheart. It is still very basic and doesn't have much going on right now but in the summer I will be selling the clothes I make, including shorts, skirts, playsuits, dresses etc so please check it out as I do have an album full of clothes I have made in the past. Thanks!